2023-12-16

1. 예제
아래는 전체 코드이다.
import 'package:flutter/material.dart';

class TextFieldOverFlowPage extends StatefulWidget {
  const TextFieldOverFlowPage({super.key});

  @override
  _TextFieldPageState createState() => _TextFieldPageState();
}

class _TextFieldPageState extends State<TextFieldOverFlowPage> {
  final TextEditingController _textFieldController = TextEditingController();

  @override
  Widget build(BuildContext context) {
    return Scaffold(
      appBar: AppBar(
        title: const Text('Text Field Page'),
      ),
      body: Padding(
        padding: const EdgeInsets.all(16.0),
        child: Column(
          mainAxisAlignment: MainAxisAlignment.center,
          children: <Widget>[
            Container(
              color: Colors.blue, // 배경 색상
              height: 500.0, // 원하는 세로 크기// 크기를 지정하고자 하는 실제 위젯을 추가합니다.
            ),
            TextField(
              controller: _textFieldController,
              decoration: const InputDecoration(
                labelText: 'Enter some text',
              ),
            ),
            const SizedBox(height: 16.0),
            ElevatedButton(
              onPressed: () {
                // Access the entered text using _textFieldController.text
                String enteredText = _textFieldController.text;
                // You can do something with the entered text
                print('Entered Text: $enteredText');
              },
              child: const Text('Submit'),
            ),
          ],
        ),
      ),
    );
  }

  @override
  void dispose() {
    // Clean up the controller when the widget is disposed
    _textFieldController.dispose();
    super.dispose();
  }
}
위의 코드를 실행 시키면 아래와 같은 화면이 나온다.

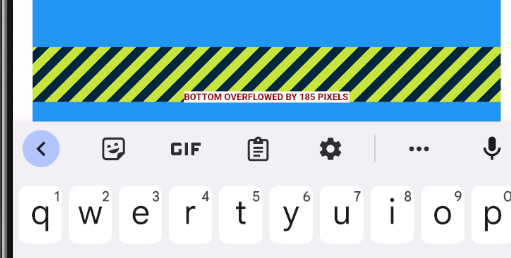
텍스트필드를 클릭하면 아래와 같이 오버플로우가 발생하게 된다. 이를 해결하는 방법을 알아보자.

2. SingleChildScrollView
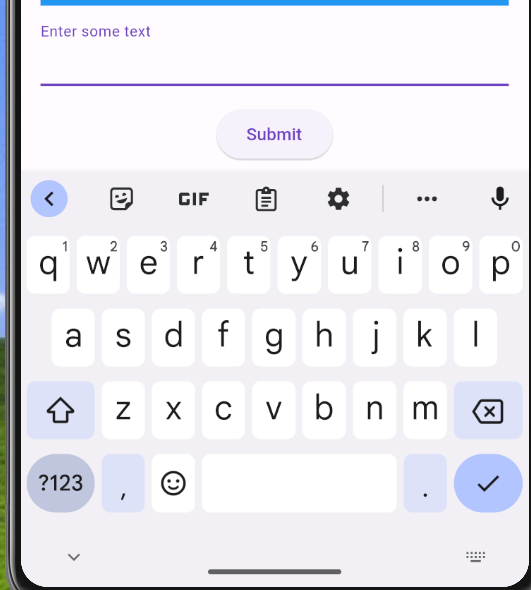
가장 간단한 방법은 전체 body 코드를 SingleChildScrollView 위젯으로 묶는 것이다. 이를통해 오버플로우가 발생하지 않고 전체 영역이 위로 스크롤되고 바래 아래 키보드가 위치하게 된다.
      body: SingleChildScrollView(
        child: Padding(
          padding: const EdgeInsets.all(16.0),
          child: Column(
            mainAxisAlignment: MainAxisAlignment.center,
            children: <Widget>[
              Container(
                color: Colors.blue, // 배경 색상
                height: 500.0, // 원하는 세로 크기// 크기를 지정하고자 하는 실제 위젯을 추가합니다.
              ),
              TextField(
                controller: _textFieldController,
                decoration: const InputDecoration(
                  labelText: 'Enter some text',
                ),
              ),
              const SizedBox(height: 16.0),
              ElevatedButton(
                onPressed: () {
                  // Access the entered text using _textFieldController.text
                  String enteredText = _textFieldController.text;
                  // You can do something with the entered text
                  print('Entered Text: $enteredText');
                },
                child: const Text('Submit'),
              ),
            ],
          ),
        ),
      ),
적용시 아래와 같이 변경된다.

3. resizeToAvoidBottomInset: false
다른 방법은 Scaffold에 resizeToAvoidBottomInset: false 를 적용하는 것이다. 해당 옵션은 키보드가 화면 하단에 나타날 때 자동으로 화면의 크기를 조정한다.
    return Scaffold(
      resizeToAvoidBottomInset: false,
      appBar: AppBar(
        title: const Text('Text Field Page'),
      ),
      body: Padding(
        padding: const EdgeInsets.all(16.0),
        child: Column(
          mainAxisAlignment: MainAxisAlignment.center,
          children: <Widget>[
            Container(
              color: Colors.blue, // 배경 색상
              height: 500.0, // 원하는 세로 크기// 크기를 지정하고자 하는 실제 위젯을 추가합니다.
            ),
            TextField(
              controller: _textFieldController,
              decoration: const InputDecoration(
                labelText: 'Enter some text',
              ),
            ),
            const SizedBox(height: 16.0),
            ElevatedButton(
              onPressed: () {
                // Access the entered text using _textFieldController.text
                String enteredText = _textFieldController.text;
                // You can do something with the entered text
                print('Entered Text: $enteredText');
              },
              child: const Text('Submit'),
            ),
          ],
        ),
      ),
    );
다만 해당 동작의 경우 화면 비율에 따라 실제 입력받는 텍스트 필드가 보이지 않을 수 있어 화면의 크기를 재조정 한다는 등의 추가 작업이 필요하다.

4. 출처
When the keyboard appears, the Flutter widgets resize. How to prevent this?
I have a Column of Expanded widgets like this: return new Container( child: new Column( crossAxisAlignment: CrossAxisAlignment.stretch, children: <Widget>[ new
stackoverflow.com
메인 이미지 출처 : 사진: Unsplash의Jeremy Bishop

