2023-10-08

1. 설치
공식 홈페이지에서 설치하는 방법도 있지만 개인적으로는 chocolatey를 활용해 설치하는 게 조금 더 편하고 간편하기 때문에 해당 방법을 추천한다. 우선적으로 windows powershell을 관리자 모드로 실행한다.

이후 아래 링크로 들어 간다.
https://chocolatey.org/install
Installing Chocolatey
Chocolatey is software management automation for Windows that wraps installers, executables, zips, and scripts into compiled packages. Chocolatey integrates w/SCCM, Puppet, Chef, etc. Chocolatey is trusted by businesses to manage software deployments.
chocolatey.org
해당 링크에 들어가면 chocolatey를 설치하는 방법을 확인할 수 있다. Now run the following command에 있는 명령어를 복사해서 설치한다.


설치 후 choco라는 명령어로 잘 설치가 되어 있는지 확인한다.

이후 choco install flutter로 flutter를 설치하면 환경 변수 설정 및 적절한 위치에 알아서 설치를 진행한다.
설치가 완료된 후 flutter --version 명령어를 사용하면 현재 버전을 확인할 수 있다.

2. 안드로이드 Emulator 연결
https://flutter-ko.dev/get-started/install/windows#install-android-studio
Windows install
How to install on Windows.
docs.flutter.dev
flutter 공식 사이트에 나와 있는 Android setup 과정을 따라 하면 되는데, Emulator 실행을 위해서는 안드로이드 스튜디오 설치가 필수적으로 필요하다.

안드로이드 스튜디오 설치가 완료되고, 실행 시 아래와 같은 화면이 나타나게 되는데, 여기서 Virtual Device Manager를 클릭해 준다.

Create Device를 클릭하고,

자신이 원하는 기종 선택

자신이 원하는 기종의 이미지 셋업을 클릭하고 Emulator를 생성한다.

3. Vscode에서 flutter 실행하기
적절한 위치에 flutter create [자신의앱명]으로 만들고 "code ." 명령어로 vscode를 실행한다. ctrl + shift + p 단축기 이후 Emulator를 입력하여, Launch Emulator 통해 자신이 실행할 에뮬레이터를 선택한다.


실행하면 에뮬레이터 창이 실행된다.
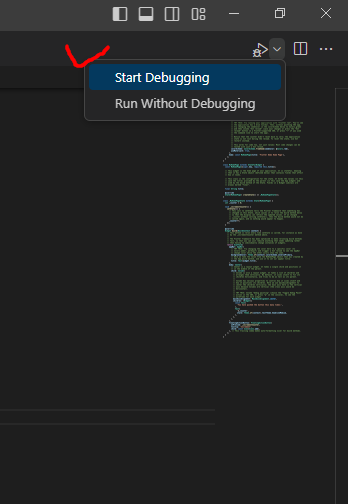
이후 vscode 우측상단에 Start Debugging을 실행하면,

하단에 Flutter: Launching...이라는 안내문구가 뜨게 된다.(최초 실행 시에 시간이 조금 걸린다.)

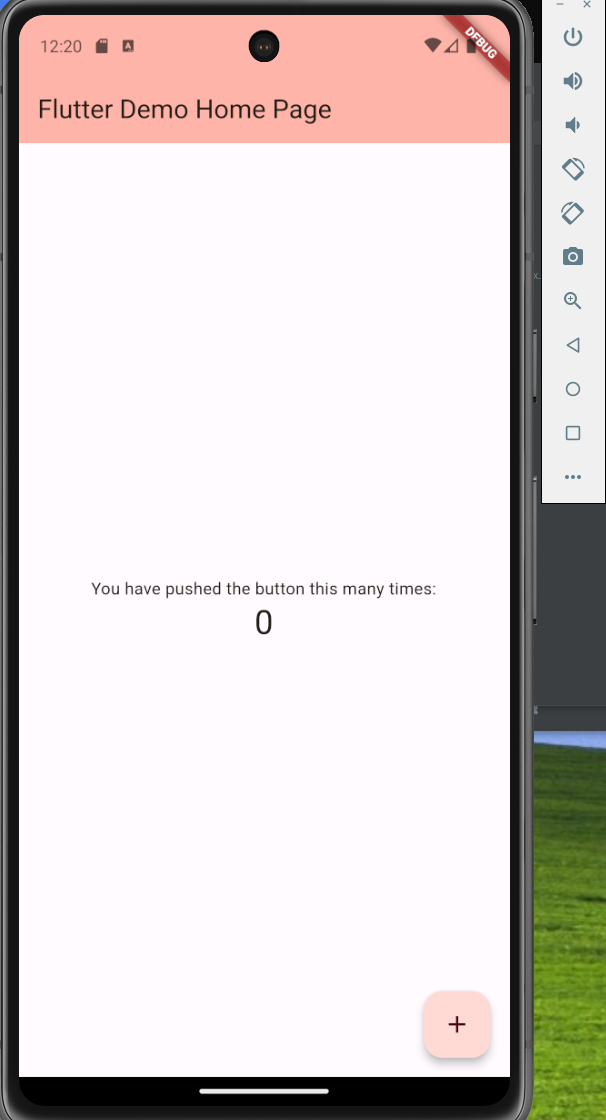
실행이 정상적으로 완료되면 flutter의 demo page를 확인할 수 있다.

메인 이미지 출처 : 사진: Unsplash의Christian Weiss

